Showing posts with label hands-on learning. Show all posts

Recipe: Jam Pork Fry

Today I confused my sweetheart.  He had this thought I was going to make honey garlic pork and here I was adding stuff to pork in a pan and not making a marinade.   I told him I wasn't making that but was replicating a meal I used to make when I wasn't hungry but needed to eat something.

This is what I did.  MIND... no real measurements happened here as I was just tossing stuff in.   I'll give approximates where I can.

Friday Fun: Cow Art (learning acrylics)

 Not feeling so well today, so simply posting a pic of my lad with his latest project.  He's taking a class in acrylic paints.
Will be linking up with Kym's Art post... you can find that here


This post may contain affiliate links - using affiliate links from A Net in Time helps fuel this blog and our homeschool - thank you! ©2006-2017 A Net In Time. All rights reserved. All text, photographs, artwork, and other content may not be reproduced or transmitted in any form without the written consent of the author. A Net In Time . We are a participant in the Amazon Services LLC Associates Program, an affiliate advertising program designed to provide a means for us to earn fees by linking to Amazon.com and affiliated sites

Fun Friday: Mudworks Part One

Did you know that I am teaching an art class at my homeschool groups Co-op days?   The class is called Mudworks.


I have this cool book (called Mudworks) that I did a art book post on... hold on while I find that. Ah, here it is.  Anyways, when I looked at this book I thought, how much run would it be to do this with a mixed ages class, so when HOPE days came up  I said SURE, I'll do this!  :)

Review: Marine Science for Kids

Marine Science for Kids is part of the for kids series put out by Chicago press. These books are fantastic resource for helping children explore a particular topic, in this case Marine Science.

Review: The Superhero Handbook

 I have to admit, this is a cute book. Written in bold, easy to read font with quick easy instructions to get children on the road to making their own Superhero gear.   The Superhero Handbook is just that, a handbook made just for your average superhero, reminding him/her of all things important to superheroes.

Art Book: Miniscapes - Create Your Own Terrarium

I recently contacted my "person" at Raincoast and mentioned that my lad was into making terrariums lately so she very kindly sent me a book that she thought might be a boon to him... and it was!   Let me tell you about Miniscapes: Create your own Terrarium.  I know I know..not your typical art book, but making a terrarium is a form of art you know?   Can you put different mediums together in a way that will balance and create something beautiful?   Miniscapes helps you to gain the know-how to do this yourself.

 
 I love the logical step up in Miniscapes.  Walking the reader through what a terrarium was and how it worked.  Being walked through all the parts of a terrarium, learning why you need the different layers, the types of plants you can use and more.  The Close of Miniscapes leaves you with several projects you can complete to get your feet wet, or to at least give you ideas for creating your own.   It's a rather neat book.
The first half of Miniscapes is devoted to teaching the reader about the various plants, and parts of a terrarium.  The different styles of glass bowls, types of rocks, plants, substrate, tools, and accessories . 


I found the text easy to read and understand.  The author was very good at explaining how everything works, making this an ideal book for a novice to terrariums, while including lots of projects to intrigue the more seasoned.
 
The Projects, more than 15 projects, each with an ingredients list, with step by step instructions for completing them.


My Thoughts:
This is a helpful little book, full of ideas and images and creations.   It's great to look through to garner ideas for different types of terrariums, or to actually create one of them as written.  My son liked it and didn't want me to add it our "let's rehome it" pile so it will sticking around for a while.  :)  (not many books make it to that status which tells you something eh?)  :)

But it's a great book to teach you how to make your own garden art form. 

Oh!   And check it out!   My lad made his own terrariums!!!


Miniscapes - Create your own Terrarium
Clea Cregan
Hardie Grant Books
Pages: 160
Approximately 8 x 8 inch square 
Type: Hardcover

Reviewed for: Raincoast Books


Where to find it: 
Amazon.ca: Miniscapes: Create Your Own Terrarium

Amazon.com: Miniscapes: Create Your Own Terrarium

--------
This post may contain affiliate links - using affiliate links from A Net in Time helps fuel this blog and our homeschool - thank you! ©2006-2017 A Net In Time. All rights reserved. All text, photographs, artwork, and other content may not be reproduced or transmitted in any form without the written consent of the author. A Net In Time . We are a participant in the Amazon Services LLC Associates Program, an affiliate advertising program designed to provide a means for us to earn fees by linking to Amazon.com and affiliated sites

Recipe: Beef Stew with Bread

Yesterday I decided to try out a bread in a box recipe and needed something to go with it.  I thought stew would be good thing to go with it and was right.
 
The fellows helped me put it together since I'd just gotten home from a walk and my feet were sore so I didn't want to stand too long.  Wasn't that lovely of them?

How to toss it together.

First off .. make the bread.  I used a box from Sunset Gourmet called "Cheesy Garlic Beer Bread Mix".  I made it using a strong ale that hubby said was getting a touch old.   This bread needs to sit for half hour before using.  It's great for dips, soups and stews.

In the store, show the lad how to price out the cheaper cuts of beef since we'll be making stew we don't need fancy meat.   Let him pick out the right package and tell him GOOD JOB.

At home, ask hubby to cut up the beef into small pieces as you dice up 1 1/2 onions and three stalks of celery.  Dump it all in the stew pot.

Liberally add some salt and pepper.  Brown in a little touch of oil.

Get the lad to wash up some potatoes for dad to dice (I think he did three large), and then set him to shelling the garden fresh peas.


Meanwhile dig out the carrots from the fridge and dice them up.. ended up with about four large carrots.   

When Dad is done with the taters watch in amazement as he tosses in tons of different seasonings and then bumble around saying.. don't we have a thickener of some sort I can throw in here?

Suggest three bay leaves to add to the pot as you dig through your stash of seasoning packages and find some dry chicken gravy mix to toss in.  Explaining to the lad that adding gravy will make it a stew instead of soup as stews are thick with less liquid.

Throw in a box of chicken bouillon/stock (the liquid stuff Campbells makes).. though if my rabbit stock had been thawed out I would have used that instead.  :)

When it's all in the pot look and say "oh, need a bit more celery" so do up two more stalks.

Discover a couple of tomatoes going soft so turn them into mush before adding to pot (saucing them before adding to the pot means a boy child not turned off by cooked tomato).   Dice up one orange bell pepper as well.

Let stew for two hours.

In end come up with a stuff slightly on the spicy side (oops.. forgot the sundried tomato mix has some chilis in it hun).   But realize the bread counteracts the spicyness quite nicely...so doing what I intended was an excellent choice with this stew.   The lad exclaims "Mom!   We need to make this again, it was good!!!"  

One of the things I love about stew is it comes out differently every single time, and when hubby and son help, makes it even better.  :)


All told we put in
1 package of stir fry beef strips
four large carrots
1.5 onions
3 bay leaves
5 stalks celery
About a cup of green peas
3 large potatoes
a variety of seasonings : salt, pepper, sundried tomato, basil, oregano, garlic and more.
one box liquid bouillon/chicken stock
package of dry chicken gravy
about a tablespoon of corn starch
two tomatoes
touch of oil for browning

If you make it, tell me what seasonings you would use.  :)

---


----
This post may contain affiliate links - using affiliate links from A Net in Time helps fuel this blog and our homeschool - thank you! ©2006-2017 A Net In Time. All rights reserved. All text, photographs, artwork, and other content may not be reproduced or transmitted in any form without the written consent of the author. A Net In Time . We are a participant in the Amazon Services LLC Associates Program, an affiliate advertising program designed to provide a means for us to earn fees by linking to Amazon.com and affiliated sites

Field Trip: Penn's Cave

Penn's Cave in Pennsylvania was a huge amount of fun for all of us to attend.  I want to tell you all about it.  :)    I don't know if my images are any good at all... but you'll cope right?


Penn's Cave is known as America's only all water cave!   You view it by boat!   They made an exit out onto a pond and it's stocked with fish.  :)

The history of Penn's Cave:  The legend of Penn's cave has a trapper named Malachi Boyer falling in love with an Indian princess Nita-nee.   The indians would not allow them to marry so one night they ran away together.  The Nita-nee's father was furious and ordered Boyer thrown into the water cave and guarded so he couldn't escape.  Boyer searched in vain for an alternative exit but failed to find one, so he crawled into the farthest area of the cave from the entrance where he died.   His body was weighted with rocks and thrown into the deepest part of the cavern.

It was a fascinating trip through the cave.  I hope this slideshow lends it justice. :)


After we came out of the cave we needed to walk ALL the way up again.  I took my time and the boys raced on ahead.   They went exploring to where the old entrance used to be.  I walked over to where part of the wildlife park was. 
 
-----
This post may contain affiliate links - using affiliate links from A Net in Time helps fuel this blog and our homeschool - thank you! ©2006-2017 A Net In Time. All rights reserved. All text, photographs, artwork, and other content may not be reproduced or transmitted in any form without the written consent of the author. A Net In Time .

Recipe: Lemon Loaf

A couple weeks back I had a yard sale, and as always, I cooked a few things just to see if I could sell them.  Some years this goes well and others years just kinda so-so, therefore I always make food that we like in our household.

I made Rhubarb pudding cake (which I love), Rhubarb Cake, and Lemon Loaf.  

I have to admit, I am not very familiar with lemon loaf.. I made it once before YEARS ago for work luncheon I think.   I used this this recipe and modified slightly based on comments.  


Ingredients:
  • 12 cup butter
  • 1 cup sugar
  • 2 eggs
  • 12 cup milk
  • 1/2 tsp lemon extract 
  • 1/2 tsp vanilla extract
  • 1 12 cups all-purpose flour
  • 1 teaspoon baking powder
  • 12 teaspoon salt
  • 1 lemon, rind of
Glaze
  • 1 lemon, juice of
  • 14 cup sugar
  • 1/2 tsp lemon extract
Directions:
  1. In a large bowl, cream butter and sugar.
  2. Add eggs, one at a time, beating until creamy.
  3. Blend in milk and 1/2 tsp lemon extract
  4. In another bowl, mix together flour, baking powder, salt and lemon rind.
  5. Pour into batter.
  6. Stir to moisten.
  7. Scrape into greased 9 x 5 inch loaf pan.   DO NOT FORGET THIS STEP.  Just saying.
  8. Bake in 350f degree oven for 55 to 60 minutes.
  9. Cool in pan for 5 minutes.
  10. Remove to rack and while still hot, with a toothpick poke holes all over the top of the loaf, and spoon glaze evenly over.
  11. Cool.
What did we think?
Oops... forgot to grease the bottom on the one I held back.  Should have. :)  BUT the recipe tastes good, the lads had fun helping me to finish it off. 


------
This post may contain affiliate links - using affiliate links from A Net in Time helps fuel this blog and our homeschool - thank you! ©2006-2017 A Net In Time. All rights reserved. All text, photographs, artwork, and other content may not be reproduced or transmitted in any form without the written consent of the author. A Net In Time .

A Pictorial Visit June 17-23

Our week in pictures.   We had a busy week, I thought I'd share it a bit with you.  :)

Saturday, A Yard Sale.  I had a whole lot more pictures, but I deleted them from my phone after the sale because well.. 90% of the stuff was either sold or donated.   It was a tough day with people being extremely frugal this year... made me feel very annoyed.  Bargain, but don't be rude.  Had some highlights in the joy of a fellow discovering our very old cooler and tent.. just when he needed one.  :)  The grin of delight in a lad discovering a dinosaur toy.  The pleasure in a fellow finding a whack of beat up candles perfect for his needs.
The horses.   I've been watching the foals a lot this week.  I've nicknamed them Braveheart and Momma's boy.   This here is Momma's boy.  Never find him far from momma, while Braveheart explores everywhere he can and boy...can he run already.
Reviews:  I've written a lot of reviews this week.  Trying to push through books I need to get done as I'm going a book sale this week and I want to see if I can move some of them into new homes.   The most needful review was UnLock Math as it had a deadline.  :)  Good program by the way, go read my review if you're looking for a math program from grades seven and up.
Laundry!  Despite a lot of rain this week I managed to get some laundry done.  Hung much of it outside despite my lad complaining it makes the towels all scratchy. :)
 Gardening!  We've been busy working on the front garden (I call it the kidney garden cause of the shape I made it in).  I do it up every other year really well, digging out the weeds, moving plants and what not.   Since we're moving this year I really pushed myself to get it done.  Did it over two days though rather than trying to get it all done in one day.  My feet HATE me when I push too hard.   See the difference?   This was day one.
While I was working on the day one of the garden my industrious lad was given the task of rebuilding our outdoor fire pit.   I just said...make it bigger and better, the design is up to you.
The end result:
That took up our Tuesday and Wednesday.
Thursday was our anniversary which took up out to London where I sold these two younglings to a pet store who were delighted to have them.
 Hubby and I went out to lunch to celebrate our anniversary.  We planned to do some shopping but my body decided it would rather NOT do that.   So we headed home after picking the lad up from gramma's house. Dinner out was very nice.  15 years it's been for us.  They've been great years for the most part and I have a keeper in a hubby that's for sure. :)   So happy with him.

Friday...oh what are my plans...I'm getting ready for a book sale (on Saturday) so have been emptying my shelves rather drastically.   My criteria is pretty simple.  Do I want to move this book?   If not...out it goes.  I've discovered books I didn't even know I had!   Most of what I don't sell will be going to a thrift shop (there's a bible for missions store that I am sure will be happy to get them).  If not there are several in the area I can choose from.  I'll be giving some away as well as I just want them GONE.

Well I think that's it... I'll try to update you again next week too...but we'll see how the week goes eh?

Oh for schooling the lad is officially on summer schedule.
That means.
Three days math (all summer). He has a choice between Kumon, Smartick and UnLock.
Three days History (until program is done). 
Language arts (two days a week).
Friday (make a kit, do a STEM project, art etc)
Reviews only as necessary.  (usually fitting these into one or two days a week).


Reviews
 Run with Me.  Autobiography of Shana Richards-Ross.
 Art book: Dangles.  Gemstones as the basis of flair in drawing.
 The Dolphins of Shark Bay.  Really really liked this book.
 UnLock Math.  Great math program, grades 7 and up.
 Kids NIV Study Bible.   This was well done.
 Grand Canyon.  Learn about the Grand Canyon.

Everything Else
 Parenting Series: Lost.   The next in the series. 
 Recipe: Beef Stroganoff.  I liked this dish. 
 W is for Winnie the Pooh.  Alphabet blogging in Canada post.
 Hymn Study: Jesus I Come.  A great old hymn.
 Garden, what about the bushy one?   A poem that I had fun writing. :)
 Steady, a five minute Friday post, a poem.
----
This post may contain affiliate links - using affiliate links from A Net in Time helps fuel this blog and our homeschool - thank you! ©2006-2017 A Net In Time. All rights reserved. All text, photographs, artwork, and other content may not be reproduced or transmitted in any form without the written consent of the author. A Net In Time .

Recipe: Beef Stroganoff

It was my turn to cook, and as I had found a roast on sale, I decided to make a recipe I had made in a long time (taking my lad's not doing cooked mushroom thing into account).  I loosely based it off this recipe off All-recipes.com.  

Ingredients and Directions: 

Put about a pound of cooked beef cut into strips or small pieces into a fry pan.  Add one largish onion, diced.  along with a wee bit of beef juices (from your leftover roast) to cook the onion in a bit.  

Add some spices... I did a red pepper mix with some black pepper and garlic.   Let that cook for a wee bit then add a can of cream of mushroom soup.   Let simmer on low for a while.  

You need to cook the egg noodles, about 8 oz.

When egg noodles are almost done, toss some peas into the water with them.  AND put 1 1/4 cup of greek yogurt (if you like a bit of tang) or the same amount of sour cream into your fry pan.  Let simmer til heated through (turn up heat a bit if necessary but not much and if you do stir it while it heats).   Drain noodles/peas.   Add to the fry pan and heat through.

Serve immediately.

Reactions:
Dad: Tastes good hun
Son: I like the noodles and sauce mom, not sure about the meat.  YEAH!!!  No mushrooms!
Me: Thought it tasted well, and I'd been in the mood for stroganoff for a while so it met that need.

------

This post may contain affiliate links - using affiliate links from A Net in Time helps fuel this blog and our homeschool - thank you! ©2006-2017 A Net In Time. All rights reserved. All text, photographs, artwork, and other content may not be reproduced or transmitted in any form without the written consent of the author. A Net In Time .

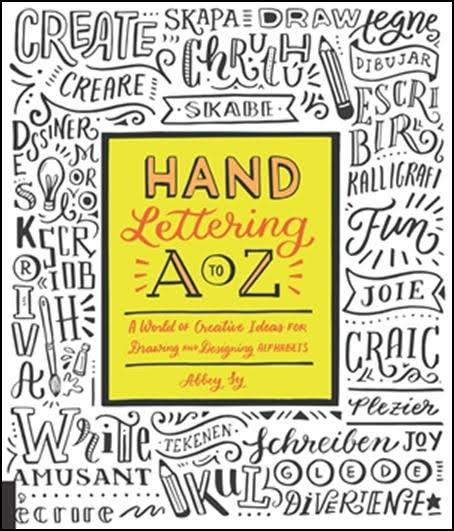
Art Series: Hand Lettering A to Z

You know how some people have a skill that amazes you?   I have a friend on the crew that regularly hand letters bible verses and her skill amazes me.  It really does!  And later I'll be sharing some of her work with you because I have this oh so lovely book to share with you today.   Hand Lettering from A to Z.  It's a book that is designed to give people who hand letter, creative ideas that they might want to try (or for people like me .. at least give me a clue about how to do it!)  (grin)
Abbey Ly has put together a book where she talks about three styles of lettering, why they are called that, and the different forms those letters can take.  Serif (6), Sans Serif (4) and Script (4).

She calls in four different artists to help illustrate these different ways to hand letter.

BUT before she gets to that, she has an introduction to the book where she teaches about different papers, different utensils, and different places to find creative ideas. I learned so much in this section.

Like...did you know that watercolour paper comes is three different styles?   Did you know that different paints work better for doing lettering or that pencil crayons can bring a vibrancy to your work?   Read and find out more eh?  :)


So let's say you want to do hand lettering...what should you do first?
Start with simple.  Seriously.  Write out a simple alphabet, learn a basic lettering of the alphabet.. make the letters smaller, bigger, squishy or wider, play around with just the basic lettering.

Then.. once you are comfortable with that...add a bit of width to it.  Draw a letter and just change one side of it. Maybe angle it a bit or make it wider all around.  Just slowly keep changing it, then as you go.. play around with it a bit, add some colour and pizzazz.  Just take it step by step and make a font that is all your own.  Who knows... perhaps your style might look like this: 
I love the bright colours found throughout this book.  Careful illustrations to show how you might replicate a style.
As you see different styles, learn the names of them.  Replicate them, become more confident in your own abilities.  Learn to create your own style all the more.  :)

As you get more confident, consider adding some embellishment to your work.
At the close of book, Abbey Ly showcases the work of her guest artists.   It was so interesting seeing the different styles.  This one is a serif style (see!   I learned something eh!).   Good to do that you know?


I thought I would share some hand lettering that I just adore from people mostly on the crew.   Don't they do a great job?

This one is by Lisa.

These are by Carol, aren't her verses lovely? 
and this one by her daughter.  You can find a post here
And if you go to the bottom of Deann's post here, you can see a lovely one she did.  :)   If you find that this book intrigues the socks off you, you might find The Postman's Knock a good blog to follow.

Title: Hand Lettering A to Z: a world of creative ideas for drawing and designing alphabets
Author: Abbey Ly
Publisher: Rockport
Pages: 128
Type: art book
Form: trade paperback
Reviewed for: Quarto Group


Where can you find this lovely book?
 Amazon.ca - Hand Lettering A to Z: A World of Creative Ideas for Drawing and Designing Alphabets

Amazon.com - Hand Lettering A to Z: A World of Creative Ideas for Drawing and Designing Alphabets

This post may contain affiliate links - using affiliate links from A Net in Time helps fuel this blog and our homeschool - thank you! ©2006-2017 A Net In Time. All rights reserved. All text, photographs, artwork, and other content may not be reproduced or transmitted in any form without the written consent of the author. A Net In Time/

Review: The Typing Coach

 Hello!   Today I want to tell you about a typing program the lad and I have been working on for the past few weeks.  You see the lad is currently writing a book called Space Cats and the work goes a bit slower than he wants so he wanted to learn to type faster... he's getting some great typing practice using The Typing Coach Online Typing Course and put together by The Typing Coach

This online audio based typing program for children comes with PDF's to download.  Two ebooks, one that's the manual and the other the workbook.   The manual breaks the keyboard down into different sections with practice sections.  The workbook has the quizzes and tests to take to show proficiency.  The online portion includes an audio component that breaks down the fingering and helps teach accuracy right from the start.


Admittedly we used the audio component in a limited manner.  We liked that it emphasized how to sit properly and how to strike the keys.  Teaching that finger movement was helpful to the lad as he had expressed a curiousity about how I could hit the q and the z so easily. 

The audio had some good basic instructions but we stopped using it because I found my lad arguing with it and talking back to the computer in a less than .... pleasing manner. It provided a talking point as, up until this time, I'd been setting him up and basically letting him work through it. The end result of our talking was this, the lad listened just enough to get the basic instruction but once the basic instruction was over he switched to just practicing and memorizing key placement.   Then I would call out the letters of the row (s) he was working on (thanks Mr. Kimball for the idea) and he would type them OR tell me where the letter was on the keyboard. This made for a much more pleasant learning environment.  It enabled us to cover the part of the audio that he found vexing, while working the program as suggested.

My son is working on memorizing key placement, doing the practice session and, when he is ready, taking the quizzes. He has learned it isn't failing if he has to go back to do more memorizing.  Happy child learning to type.. which is exactly what I want for him.

Would you like to know what the course outline is?   Here it is:


  • Course Introduction
  • Before & After Snapshot
  • Having Good Posture
  • Home Row
  • Top Row
  • Bottom Row
  • Shift Keys
  • Evaluating Your Skills
  • Typing Practices
  • Number Row
  • Serious Practicing
  • Final Assessment
  • Conclusion
 We are not working through the course speedily but I am seeing progress and his confidence being boosted in his typing abilities. I would say that more importantly HE can see that he is making progress and that is the important thing.  The tests that he takes tell him how he is doing and he'll come down and say "MOM!  Guess what!   I got the first top row quiz right!!   I made no mistakes!"


As the tests etc are all done on-line it's admittedly difficult for me to show you some of the lad's completed work but... I can show you the book he's working on.  :)   He types for 20 minutes every day and I find that his daily output is getting longer the more confident he gets.  :)  I can't say he LOVES doing his keyboarding practice to get to this point, but he is starting to see the value.


We have a goal in mind you know.  To learn how to touch type quickly, but until then, the lad has figured out that it doesn't matter how long it takes, as long as he eventually gets there.  He eventually wants to type as fast as his mom does without looking at the board.  It's a good thing that eh?

As Dave says:
As we go through the course, we find the initial learning is done using your computer's word processor but all practices and tests are done in the Typing Coach Practice and Testing Center. It's starts testing from the moment you press down the first key.  All lessons and tests are in a pull up menu.  You just need to input the students name and email and select your item along with a time limit and it sets it all up for you.  You can find the correct time limit in the PDF.
The student knows immediately how they did, and you can get a copy sent to your email immediately.  As you can see, they spell out just what the error was, even if it was too many spaces, or a word spelled incorrectly.    The lad liked the immediate feedback, though occasionally found it frustrating if he accidentally put in one too many spaces and it threw the whole thing off.  But for my accuracy minded lad it made sense to him.  :)

Our Opinions:

It works!   That's the good thing right?   Mr. Kimball works hard to ensure that his students are learning well.  In the end, the lad is seeing progress, I am seeing progress and that makes for a usable, workable program.   Just make it work for you.


Vendor: The Typing Coach
Product: The Typing Coach Online Typing Course
Received: one year subscription to the online course
How many can use: multiple students 
Price: $17 per year

One hundred members of the crew are reviewing The Typing Coach, I hope that you'll check us out, click here or on the image below. 


Social Media Links:


This post may contain affiliate links - using affiliate links from A Net in Time helps fuel this blog and our homeschool - thank you! ©2006-2017 A Net In Time. All rights reserved. All text, photographs, artwork, and other content may not be reproduced or transmitted in any form without the written consent of the author. A Net In Time/